It usually starts with something small. You glance down at your sandals and notice it—a faint dark shape where your heel rests, or the outline of your toes pressed into the footbed. At first, you ignore it. Maybe it’s just lighting. Maybe it’ll fade.
But it doesn’t. Over time, those marks become more visible. What was once your go-to, stylish pair slowly starts looking dull and used. The comfort is still there—but visually, they no longer feel “fresh.”
The Shift From “Everyday” to “Just at Home”

We’ve all experienced it. Your sandals are still soft, perfectly shaped to your feet, and incredibly comfortable. But the footbed tells a different story.
Latest Stories
 Scientists Capture 8 Incredible Images of Interstellar Comet Passing Through Our Solar System
- Dark patches from sweat
- Dust stuck in the material
- A heel mark that won’t go away
Suddenly, you stop wearing them outside. They become your “house sandals”—good for quick errands, but not for going out. It’s a small disappointment. Especially when those sandals hold so many memories—walks, trips, summer evenings.
Most people assume: this is permanent. Time to replace them. But that’s not always true.
The Truth About Those Dark Foot Marks
Those marks aren’t permanent damage. They’re mostly built-up layers of:

- Sweat
- Natural skin oils
- Dust and dirt
- Everyday grime
Over time, these layers settle into the material, especially if the sandals are worn regularly.
The good news?
They can be cleaned—and often much more easily than you think.
The Simple Cleaning Trick Anyone Can Do
You don’t need expensive products or special cleaners. The solution is surprisingly simple:

- Mild soap
- Lukewarm water
- A soft brush (like an old toothbrush)
- A clean cloth
That’s it. But the real difference comes from how you clean, not just what you use.
First Step: Know Your Sandal Material
Before cleaning, it’s important to understand your sandal type. Different materials need different care.
- Suede / Microfiber: Soft and slightly fuzzy
- Leather: Smooth and delicate
- Cork: Firm with a natural texture
- Rubber / Foam: Flexible and water-friendly
Treating them correctly helps avoid damage and gives better results.
Latest Stories
 Meteorologists warn overnight snowfall could reach historic levels, as officials discourage travel
Step-by-Step Cleaning Process
1. Remove Loose Dirt
Start by brushing off dust, sand, or debris. This prevents rubbing dirt deeper into the material.
2. Prepare Soapy Water
Mix a small amount of mild soap into lukewarm water. Avoid harsh chemicals.
3. Gently Scrub the Footbed
Dip your brush lightly and clean using small circular motions.

- Focus on dark areas
- Be gentle, especially with suede or leather
- Don’t soak the sandals
You’ll start to see dirty water lifting off—this is the buildup coming out.
4. Wipe Clean
Use a damp cloth to remove soap and dirt residue.
5. Let Them Air Dry
Place your sandals in a cool, shaded area. Avoid direct sunlight or heat, which can damage materials.

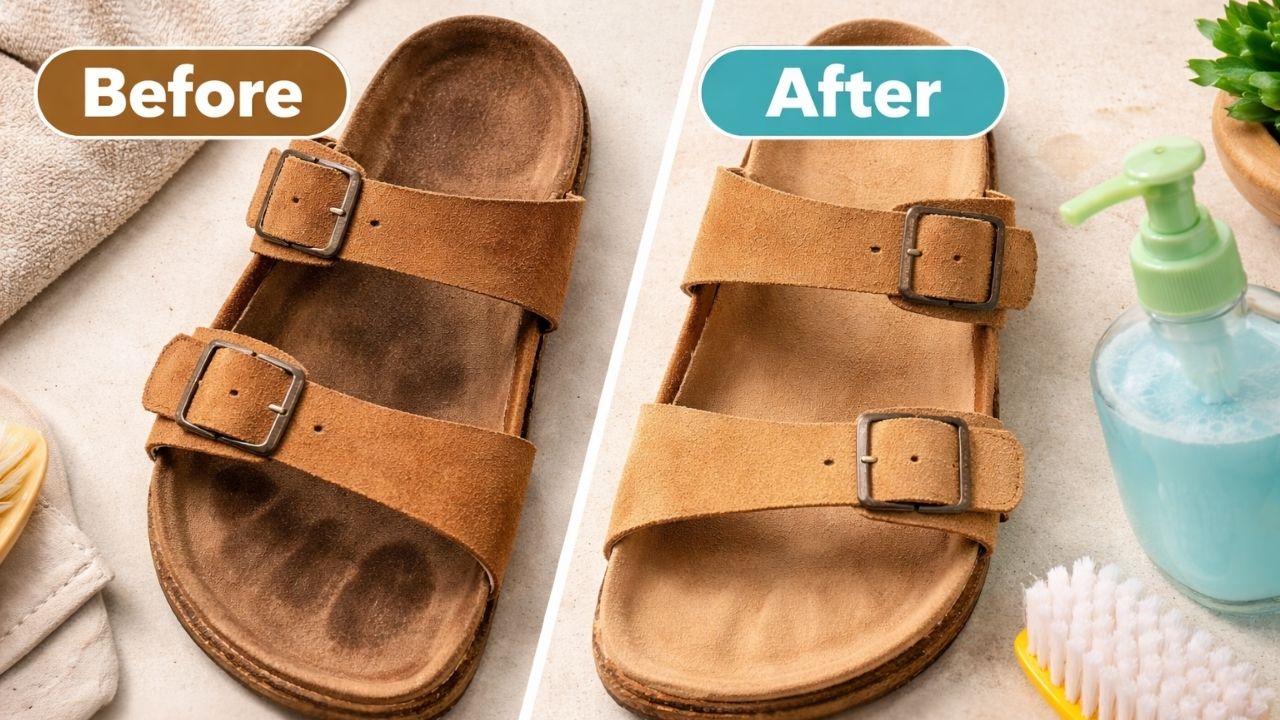
Watching the Transformation
The change won’t feel dramatic at first—but you’ll notice it.
- Dark patches become lighter
- Footprints fade
- The color looks more even
Your sandals won’t look brand new—but they will look clean, refreshed, and wearable again. And that’s often enough to bring them back into your daily routine.
Why This Feels Surprisingly Good
Cleaning your sandals isn’t just about appearance. It gives a sense of:

- Care
- Restoration
- Extending the life of something you love
Instead of throwing them away, you’re giving them a second chance. In a world where replacing things is easy, fixing them feels meaningful.
How to Prevent Marks From Coming Back
You can’t completely stop wear—but you can slow it down. Here are simple habits that help:
- Rotate your sandals instead of wearing one pair daily
- Brush off dust regularly
- Clean lightly every few weeks
- Let sandals dry properly after use
- Avoid wearing them with dirty or sweaty feet
These small steps make a big difference over time.
Latest Stories
 A Mysterious Object From Another Star Is Racing Through Our Solar System—And Scientists Are Stunned
A Small Habit That Changes Everything
Taking a few minutes to clean your sandals can completely change how you feel about them. Instead of worn-out shoes, they become something you enjoy wearing again. It’s not about perfection—it’s about care and attention.